
I love collecting photos of my ancestors. A great reason to connect with cousins is that you never know what photos and artifacts have been passed down to them. One of the benefits of being the family genealogist is that these often get passed on to me. It wouldn’t do just to have these pictures, so I wanted to share how I ended up displaying them.
Things you will need: pictures, frames, ruler, measuring tape, paper, scissors, painting tape, nails and hooks.
1) collect pictures : I made a folder on my computer to put all the pictures in. You should scan any original pictures that you want to display. They will eventually fade in the sun, so keep the originals somewhere safe and display a printed out scanned version instead. The only exception would be for pictures that cannot be scanned; for example I have 2 large framed charcoal portraits that are too big for the scanner. For stuff like these, display them away from sunlight (mine are in a dark hallway) and consider replacing the glass in the frame with special UV-filtering glass. Also consider that “pictures” doesn’t have to mean people. I have a couple of maps framed, as well as both sides of a picture of my great-grandparents’ house that flooded (1). The back side of the picture had writing on it that I was also interested in displaying. You could also consider framing quotes or a family tree, as well as displaying important family artifacts (my great-aunt has my 2x great-grandfather’s violin on display). Once you have decided on all the pictures you want to display, rename the files to include the size you want them printed as. Standard sizes (i.e., the easiest ones to find frames for) are 4×6, 5×7, 8×10 and 11×14. Then send them off to be printed! At this point you might notice that the size you wanted it to be printed as doesn’t work. For instance, I had a photo that was only able to be printed properly as a 4×8, and a few that only worked as 5×5. It’s important to find this out before you go to the next step!
2) collect frames: you now know how many pictures you have, and what sizes you need. If you don’t have enough frames, you’ll have to get some. There are many places that sell frames, but if you’re looking for a bargain try thrift shops and garage sales (including online places like Craigslist and VarageSale). Make sure the ones you get can hang on the wall. I opted to go eclectic, meaning my frames don’t match. Also consider frames that house multiple pictures. My parents have 2 giant frames that have most of their pictures in them. I opted for a few frames that can have two pictures in them. I was able to find frames for the 5×5 photos, but not the 4×8. If you have an odd shape you are having trouble finding a frame for, just buy a frame that fits the photo and get a custom mat. I ordered from custommat.ca (2). I found their prices were good and their website easy to use. I got a mat for the 4×8 to fit in an 8×10 frame. I’m really happy with how it turned out!
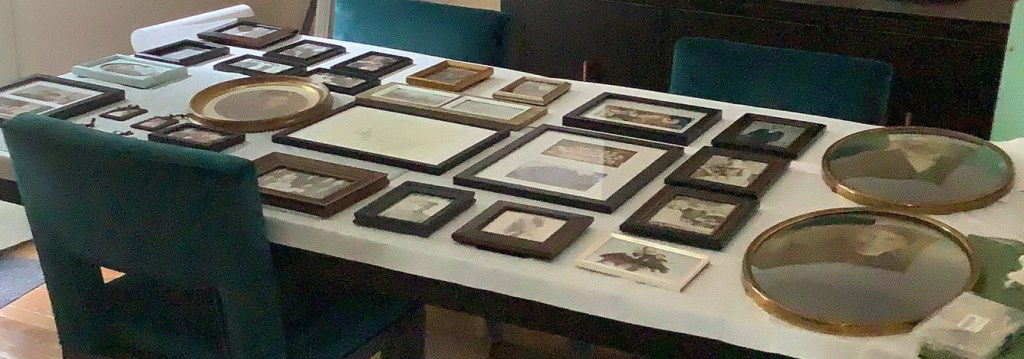
3) arrange your photos: before you start getting your pictures up on the wall, you’ll want to figure out how you want them arranged first. I used my dining room table to lay everything out, and rearranged them until I got them the way that I wanted.
5) trace the photos: pretty self explanatory. Be sure to also trace the spot where the hook/nail goes.

6) find centre of wall: hang your first paper there and then work your way out from there

7) Hang the photos. In my first attempt at a gallery wall I used sticky strips to hang my pictures. These work well if you’re making a temporary wall and plan to rehang the pictures every year or so. Longer than that and your pictures will start falling off the wall. This time I opted for nails and hooks.

I hope you found this tutorial helpful!
1) Jennifer Wiebe, “Happy Birthday, Bert!,” Jennealogie (https://maltsoda.wordpress.com/2019/09/30/happy-birthday-bert/ : accessed 7 April 2023).
2) Custom Mat (https://www.custommat.ca/ : accessed 7 April 2023).
3) Jennifer Wiebe, arranging the pictures, digital image, 2021, privately held by Jennifer Wiebe, Montreal, Quebec.
4) Jennifer Wiebe, tracing the pictures, digital image, 2021, privately held by Jennifer Wiebe, Montreal, Quebec.
5) Jennifer Wiebe, hanging the template, digital image, 2021, privately held by Jennifer Wiebe, Montreal, Quebec.
6) Jennifer Wiebe, hanging the pictures, digital image, 2021, privately held by Jennifer Wiebe, Montreal, Quebec.

Leave a reply to Restoring Old Photos | Jennealogie Cancel reply